New Order Now direct ordering process
Walkthrough of How To Use The New TranscribeMe! Order Now Process Directly From The Website
TranscribeMe! now has an easy-to-use Direct Order process straight from our website for our consumer credit card customers. This process provides a more transparent and easy to use process with less steps than our normal Customer Portal process. Our Business and Enterprise customers are encouraged to continue to use our Customer Portal process as described in this walkthrough.
When Should You Use The Order Now Process?
Customers who will be paying for their transcript orders using a credit card or invoicing, do not need any custom formatting or special considerations and have their files ready to be ordered.
How Do I Use The Order Now Process?
Once you have decided to use the Order Now process rather than logging directly into your customer portal account you will need to navigate to the TranscribeMe! website here.

Choose which transcription type you want: There are 2 options from our landing page to choose which type of transcription you want:

a) There are 2 options for your transcript type so you can choose either Automated transcription for $0.07 per minute or Human Edited transcription starting at $0.79 per minute.

b) No matter which option you choose, once you have clicked on the green 'starting at' price button, you will have the file upload window pop up. You can upload files from your computer by either dragging and dropping files into the first box or clicking the 'Choose Files' button and use your window navigation to choose your files to upload and hit open:
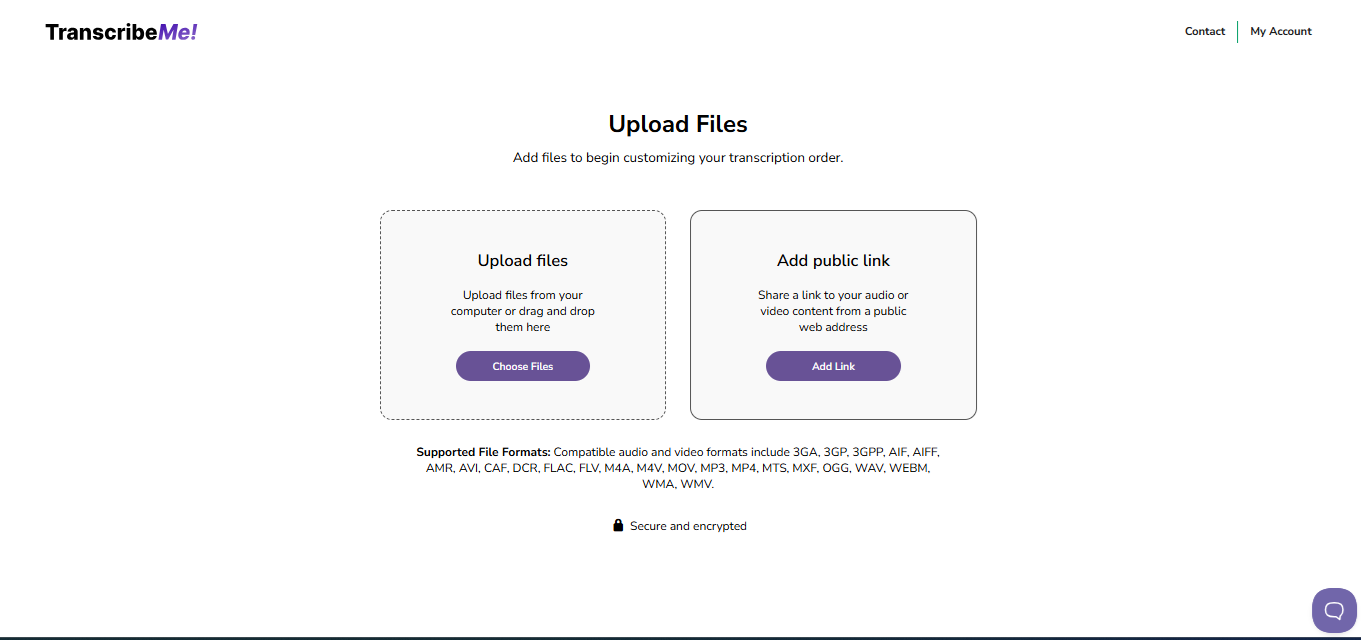
c) You can upload files using URL links for files that are not password protected or behind a paywall. Youtube files now require a premium account to be able to download videos, which means it is behind a paywall, whereas Vimeo files are not and can be linked for uploading. Other URL links that work are Google drive share folders, drop box, etc.
Customizing Your Order
Once you have uploaded your file using the Order Now process you then have the option to customize your order based on language or added features, etc. depending on the type of transcription you chose.
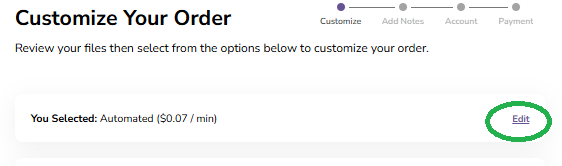
If you chose the Automated Transcription option: Once your audio or video file has been uploaded the Customize Your Order page will open. This allows you to make the following edits to your order. :
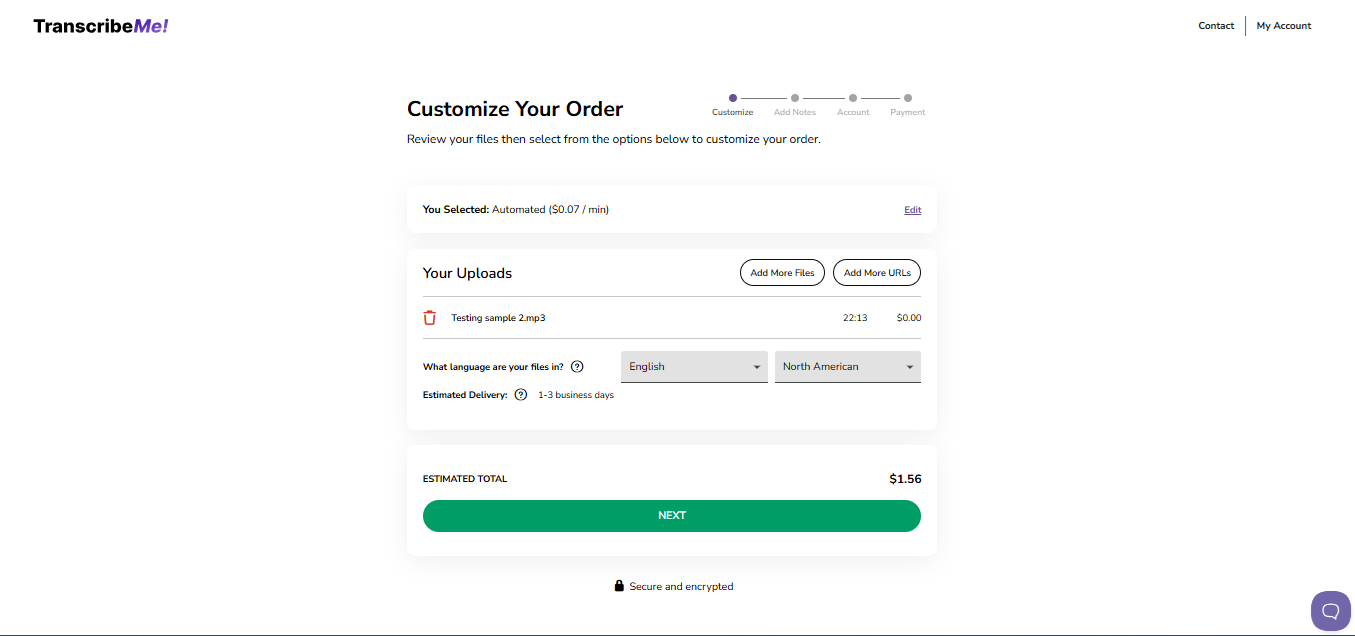
a) If you decide to go for Human Edited transcripts instead you can left click on the "Edit" icon. This will take you back to the selection screen and you can change to Human Edited.
b) Beside the 'Your Uploads' title you can select the option to add more files to your order, or add more url's if you used the upload links option.

c) The next section shows the title of the file you have uploaded, the duration of the audio file in hours and minutes, and then the price of the transcription.

d) The next 2 options are the source language of the audio file and the language accent. (Please be aware that the language accent is the spelling style used in the transcript, not the accent of the speakers). The default selection is English and North American.

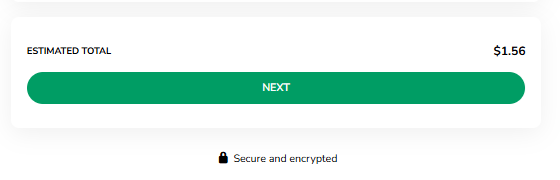
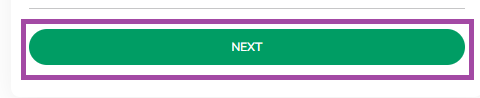
e) If the options are not changed the final cost of the transcription is listed. To continue with the order click the green "Next" button.
NOTE: Automated Transcription accuracy is extremely dependent on the quality of the audio recording, the clarity of the speakers, with minimal background noise, crosstalk and number of speakers. Due to this, there is no guarantee of accuracy and customers order Automated Transcription knowing that improved accuracy may require an upgrade to human edited transcription.
If you chose the Human Edited Transcription option: Once your audio or video file has been uploaded the Customize Your Order page will open. This allows you to make the following edits to your order:
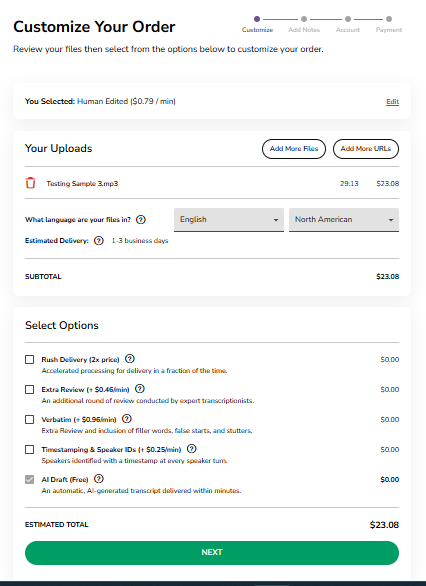
a) All the same options in a to d above for automated transcription are also available for Human Edited Transcription.
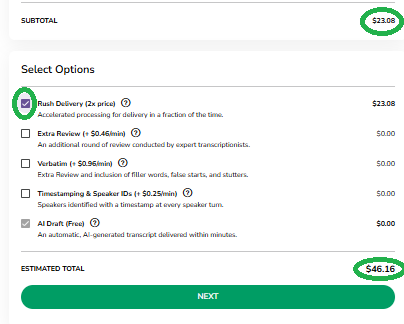
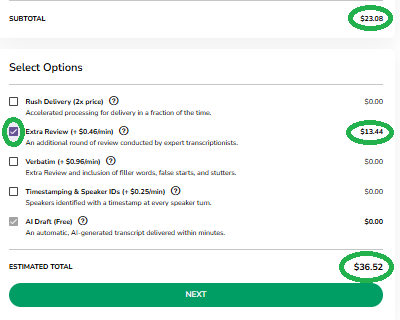
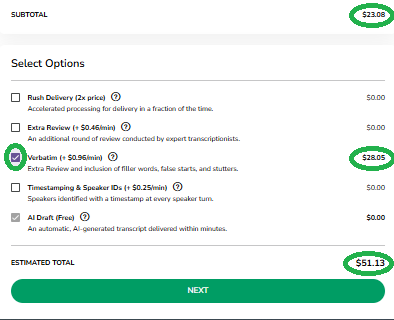
b) The main difference at this point is that the price in the first section is the subtotal before any options are added on and is based on the audio being transcribed by an inital human pass. This price will change if any Options are selected to add on:
i) Rush delivery - this is 1 Business day delivery, and doubles the price of the transcription to ensure it will be completed by the end of the next business day. If you are just selecting Human Edited, selecting Rush will do nothing but double your cost, as Human Edited transcription should be completed within 24 hours without selecting Rush. Also, Rush can not be selected if Verbatim is also selected.
ii) Extra Review - Tnis is where the original transcription is reviewed by an experienced Quality Assurance transcriptionist, who ensures accuracy and consistency in spelling, punctuation and context. This is the product formerly referred to as Standard using the industry's Clean verbatim requirements, that do not include stutters, repeated words, false starts, hesitation sounds, crutch words or feedback words. This adds the Accuracy Guarantee to the order.
iii) Verbatim - This is full verbatim where every word is transcribed including all of those words excluded in the Extra Review. This includes the extra review level as well, and it adds the Accuracy Guarantee to the order.
iv) Timestamping and Speaker IDs - If you require Speaker IDs (these are where the same number is assigned to the same speaker throughout the transcript based on the order in which they speak, so S1 is the first speaker, S2 is the second, etc.). These are not speaker names, but are speaker IDs only. It also adds Timestamps at every speaker turn.
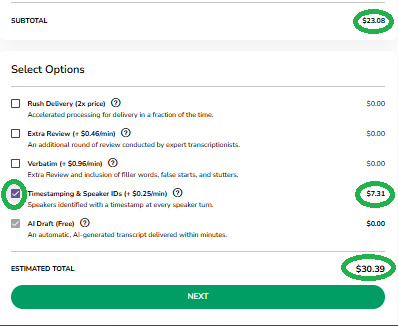
It is also possible to do a combination of selections, such as Extra Review and Timestamping, or Verbatim and Timestamping, or Rush and Timestamping, or Rush and Extra Review, etc.
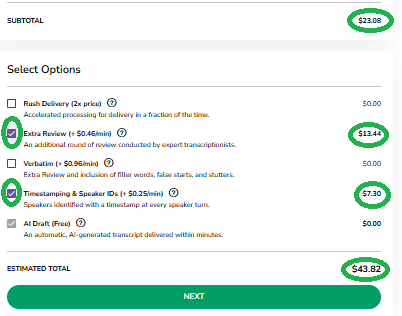
v) AI Draft - This is automatic and free for all orders, as it provides the initial automated speech recognition file within a few minutes of the file being ordered.
f) If the options are not changed the final cost of the transcription is listed. To continue with the order click the green "Next" button.
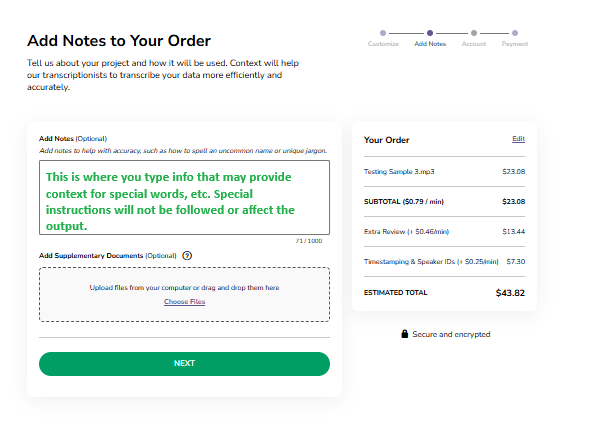
Using the Add Note Section
Once you clicked the "Next" button the Add Notes page will pop up. This is where you would type in any notes if appropriate. Please note that the screen is the same whether you have chosen Automated Transcription or Human Edited Transcription.
The first section of the Add Notes section allows you to change the type of your Transcription option: If you want to change your transcription type, you can do so easily by clicking the "edit" word at the top of the screen. You can then switch the type by clicking on the corresponding button as per the pop window.

The original choice of Transcription Type will then pop up, and you can change the transcription type if you wish.
The section under the optional Add Notes title is a text box that allows you to type specific information that may assist with the accuracy of your transcript: When using this section you have to keep in mind the following things:
a) Transcriptionists can not follow special instructions for customized formats left in the notes section. Customized formats include things such as:
i) Transcribe only certain portions of the audio, such as only certain speakers, only certain time increments, etc.
II) Use speaker names instead of speaker ID numbers.
b) Automated Transcripts do not have human beings to read the notes, so it will not affect the transcription at all.
c) This section is best used to provide proper spelling of words or names that are spoken in the audio, some context as to what the audio is about, etc. For example, if the transcriptionist knows the audio is about glass blowing company, the transcriptionist will know where to look for specific spelling of unfamilliar terms associated with glass blowing.

If you have been advised by the Sales or Finance team to upload supplementary documents, this is where they are uploaded: Only use this section if you have been advised to do so by the TranscribeMe! sales team.
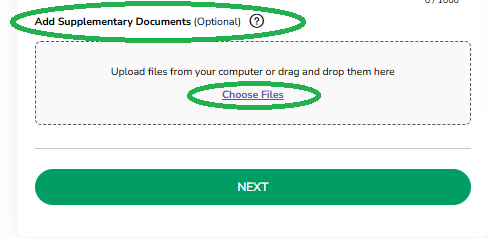
a) Click on the Choose Files link, and a file navigation window will open. Select the supplementary documents you've been asked to attach and click the 'open' or 'done' or 'attach' button, depending on your device system.
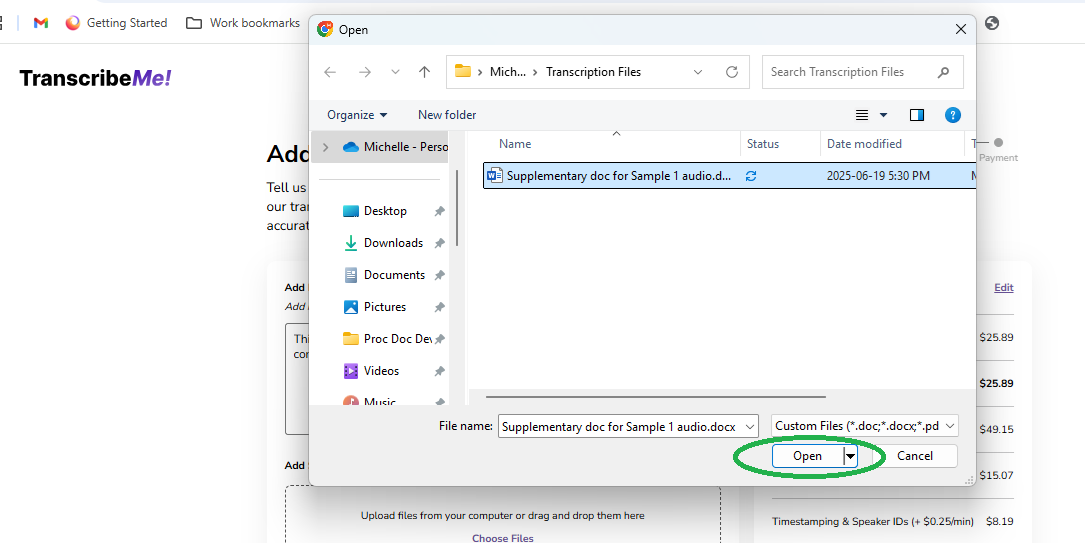
b) The screen will now return to the Order details screen an you will see the document as an attachment.

Once you have completed customizing your order, hit the green "Next" button. This will take you to the next step, which is the customer portal account step.
The Customer Portal Section
Once the "Next" button has been clicked one of 2 things will happen in the process, depending on if you are a brand new Customer or it's been a while since you ordered anything, or if you are a returning customer who has ordered files recently. The screen that pops up depends on your status as a TranscribeMe customer.
First time users of TranscribeMe!: If this is your first time using TranscribeMe! the Sign up screen to create a new Customer Portal account will appear.
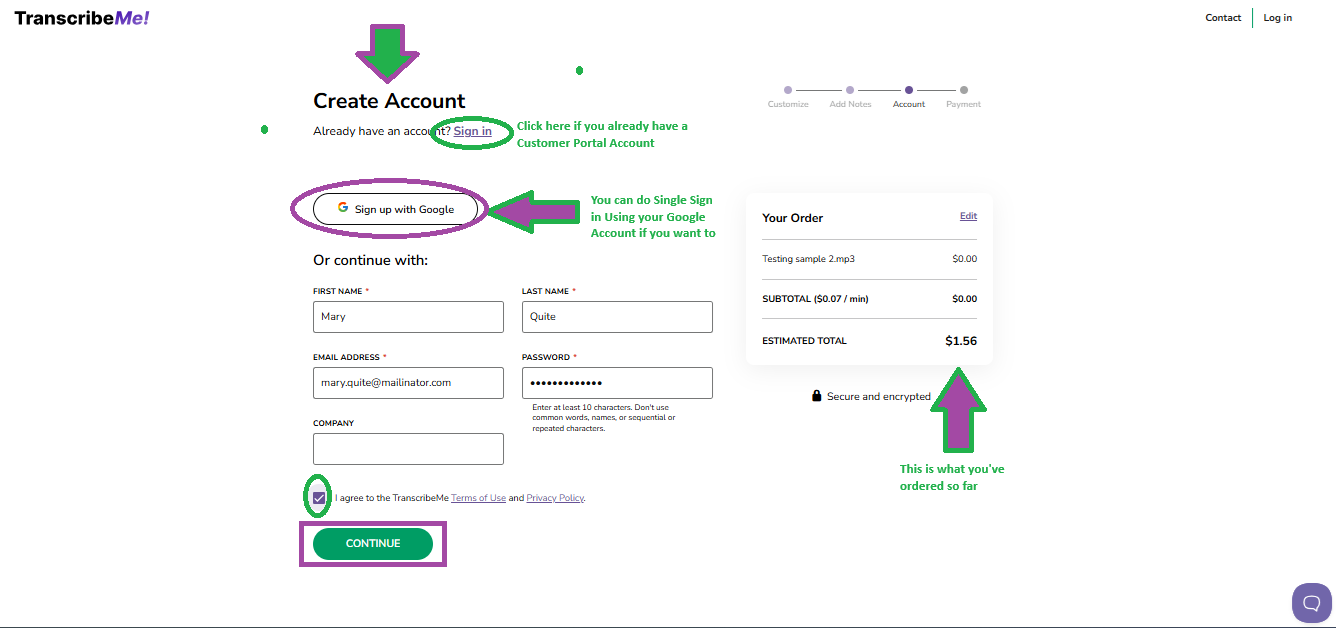
a) The Create Account screen has several different features on it that you can choose to interact with.
i) On the right hand side of the screen you can see a summary of your Order as it is up to now. If you find you want to edit your order, you can go back and edit it by clicking the edit button.
ii) If you have an existing Customer Portal accountbut you haven't logged in in a while the system will treat you as though you are a new customer. You can still log into your old account by clicking the Sign in link below the Create Account title.
iii) If you want to use a single sign on for both your Customer Portal account and your personal Google account, you can do that by clicking the 'Sing up with Google' button.
iv) You can also just enter your First and Last Name, and email address, as well as physical address to create a regular Customer Portal account.
v) In order to continue you have to click the box stating you have read the Terms of Use and Privacy policy. Once you click this, the 'continue' button will turn green and you can click it.
Frequent users of TranscribeMe!: If you have recently logged into your Customer Portal account, the system will remember you and automatically log you into your Customer portal account, skipping the Account screen altogether. This will place you directly into the last screen, the Payment screen.
Paying For and Placing Your Order
Once the "Continue" button has been clicked, or the system has automatically logged you into your existing Customer Portal, the Payment/Place Order screen window will appear.
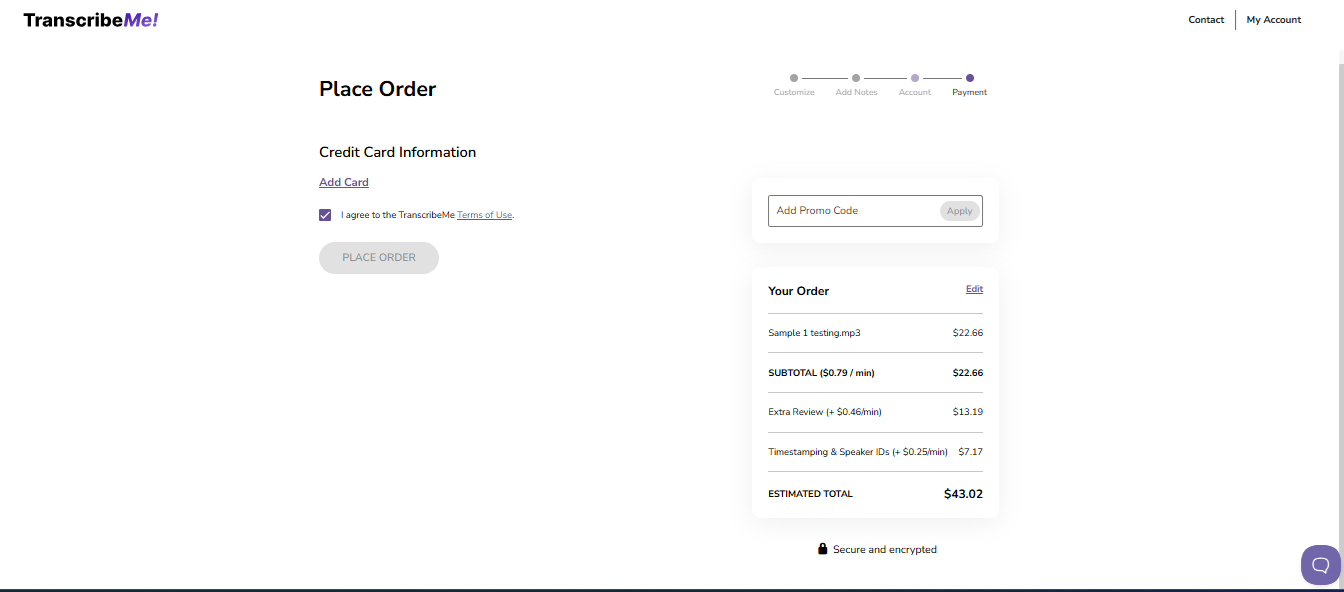
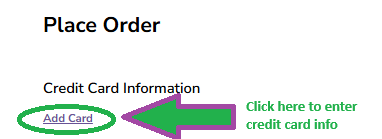
a) All retail customers must pay for their orders via a credit card. Under the Place Order title on this screen you will find an 'Add Card' link. To add your credit card information to pay for your order click on the link.
i) A pop up window will appear that lets you put in all of your credit card information. Please note, this info will not be saved to your customer portal unless you check the box saying you want it saved. If you don't check the box, the credit card information will only be provided to the third party processor and not remain on our platform.
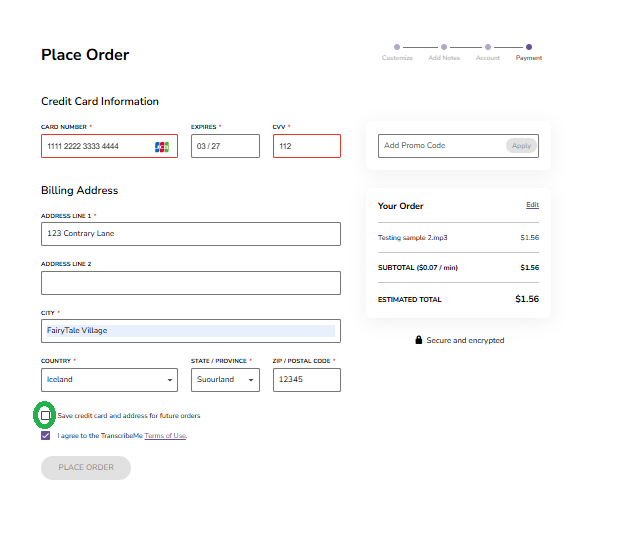
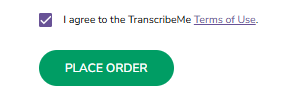
Once the terms of Use have been agreed to, and a valid credit card has been entered the 'PLACE ORDER' button turns green and can be clicked if you are ready to submit your order.
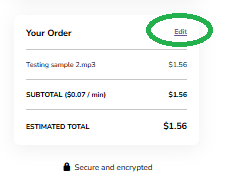
ii) On the right hand side of the screen you can see a summary of your Order as it is up to now. If you find you want to edit your order, you can go back and edit it by clicking the edit button.
iii) Also, if you have been dealing with our Sales Support and Finance teams and have been provided with a promo code, you can enter it here. If you have been improved for invoicing you can enter the promo code without having to add the credit card info in step i).
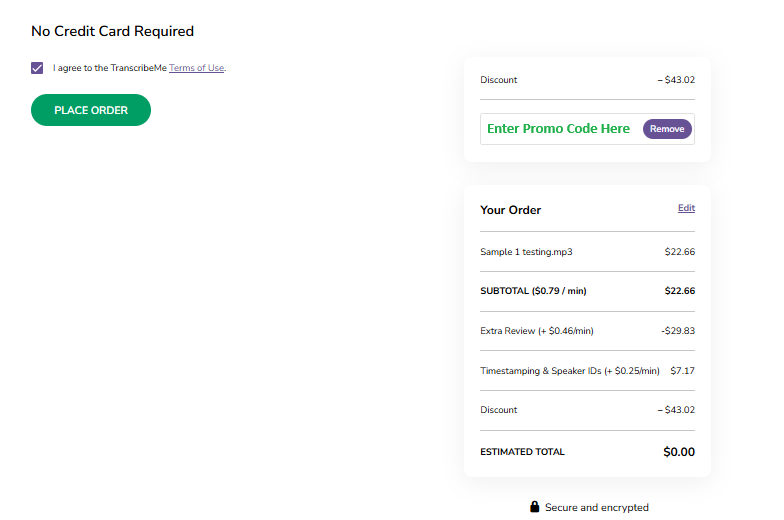
iv) Once the PLACE ORDER button turns green, you can click it to finish the order process.
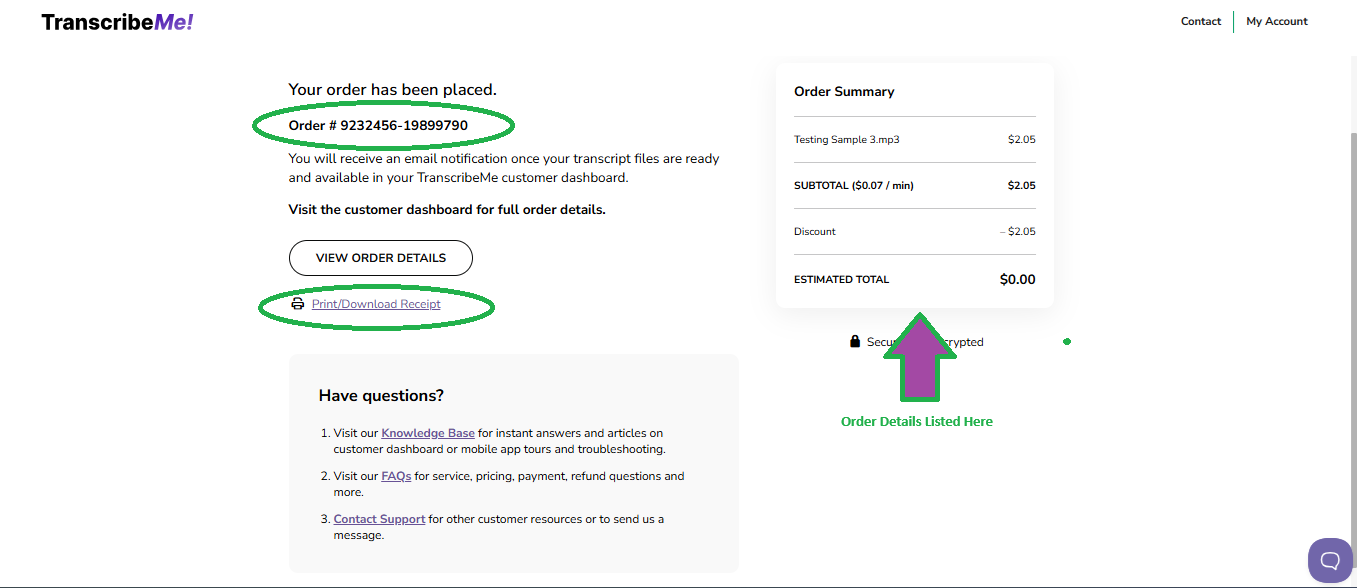
b) Once the PLACE ORDER button has been clicked a confirmation screen will pop up confirming the order has been placed, the order number, and links to download your order receipt and to view our Knowledge base and FAQ's.
If you have any questions regarding this process, please do not hesitate to reach out to our support team at support@transcribeme.com.